
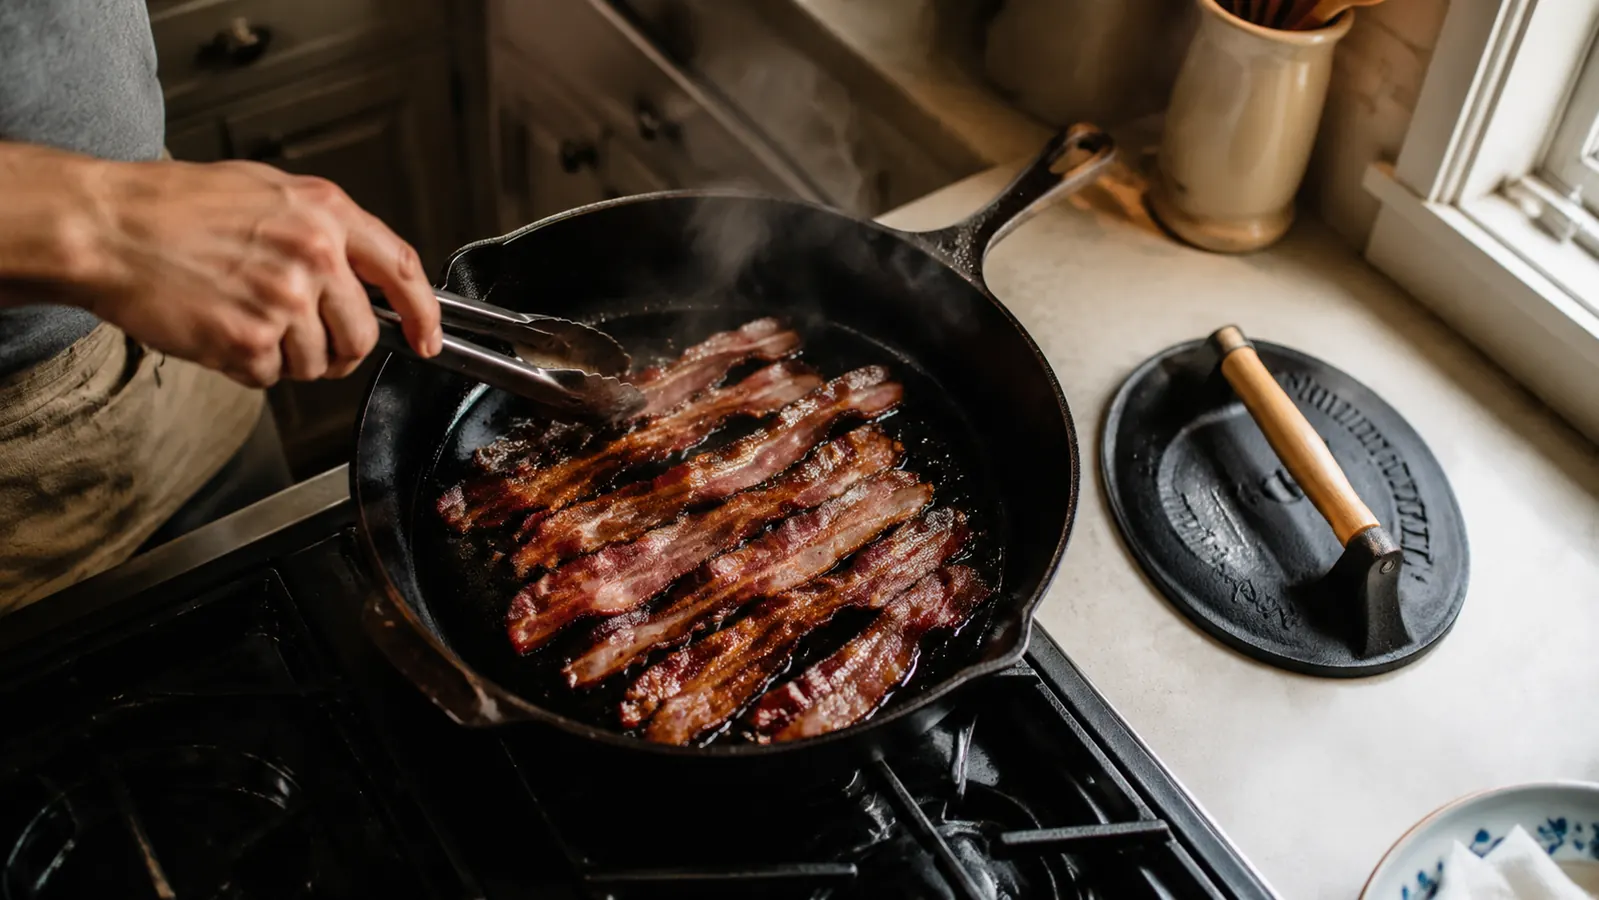
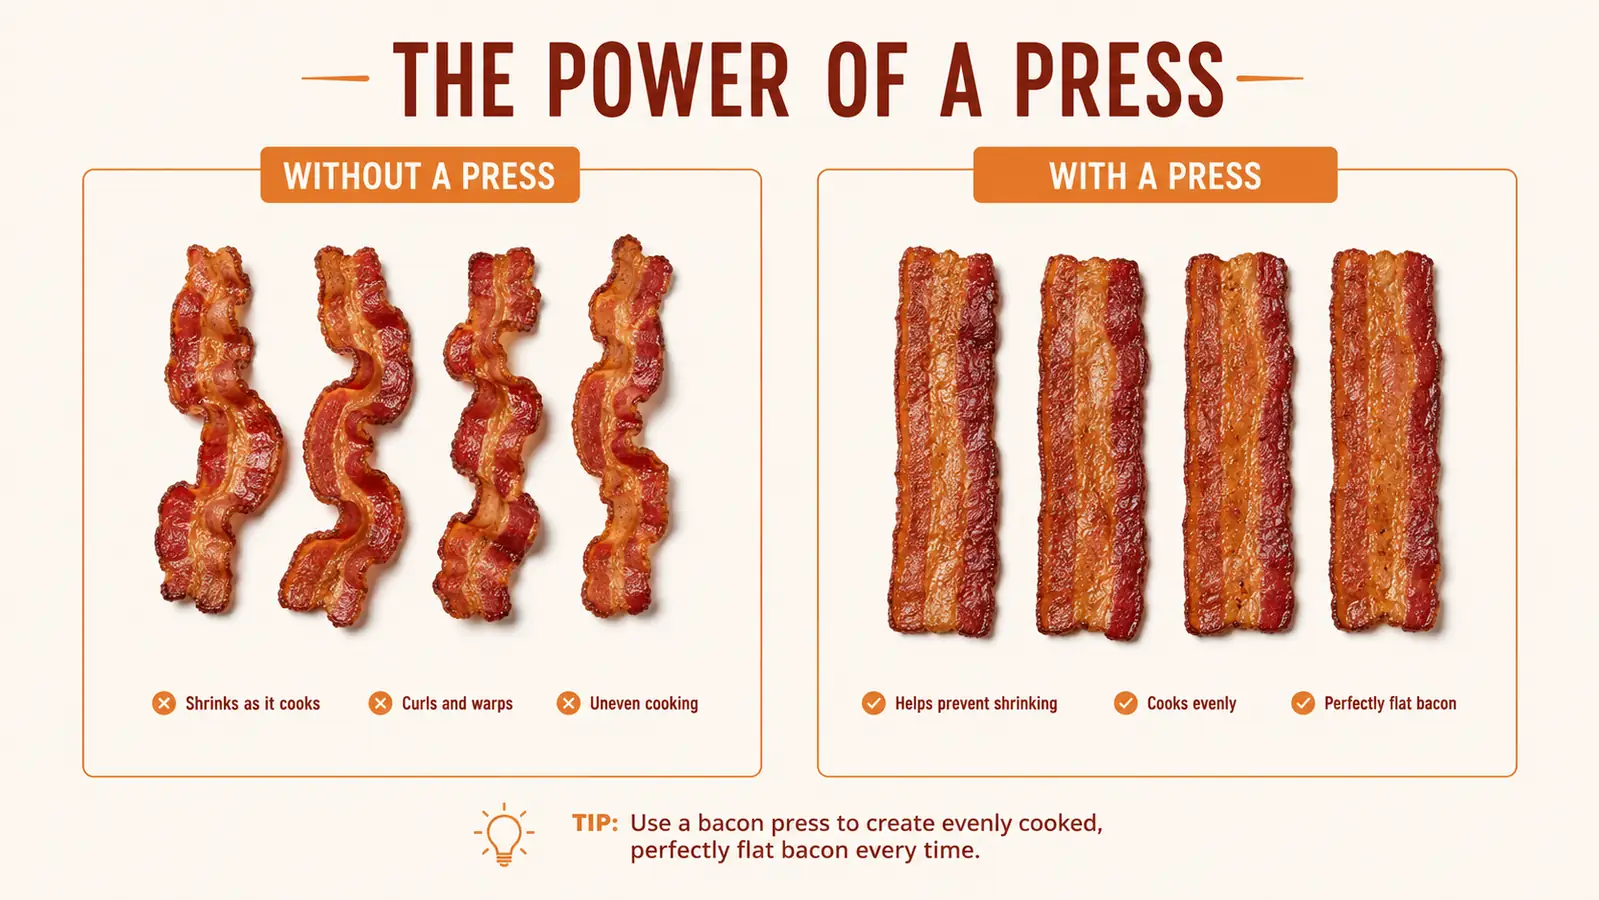
I used to think curled up, shrunk down bacon was just how bacon cooked. Every Sunday I'd lay eight or ten strips in the skillet for Sherry and the grandkids, and every Sunday half of them would buckle into little taco shapes, cook dark on the ridges and stay pale and floppy everywhere else. Some mornings I'd end up with three strips crispy, three strips chewy, and a couple that were basically burnt on one edge and raw on the other. I chalked it up to bad luck with the pan.
It wasn't bad luck. It was physics. Bacon has fat running through it in uneven layers, and when that fat renders out unevenly, the strip curls toward whichever side is shrinking faster. The fix turned out to be embarrassingly simple: weight it down flat while it cooks. I picked up a Cuisinart cast iron press with a wooden handle, the same kind guys use for smash burgers, and started using it on bacon almost by accident one morning when I didn't feel like flipping ten curled strips one at a time. It's been my go-to method ever since.
This isn't some restaurant trick that needs special equipment or a stove hotter than what most of us have at home. It's five steps, and once you've done it two or three times, your hands just know the timing. I've walked my daughter-in-law through this exact method over the phone while she stood at her stove, and she had flat, even bacon on the first try. That's the whole reason I'm writing it down here instead of just telling people at church potlucks one at a time.
Stop fighting curled up bacon strips
A flat cast iron press does the one thing a spatula can't: it holds every strip down evenly against the pan so the fat renders out flat instead of curling. Cuisinart's version has a comfortable wooden handle that stays cool enough to hold with one hand while you work the stove with the other.
Amazon Check Today's Price on Amazon →Step 1: Pick the Right Pan and Let the Bacon Come Off the Cold
Start with a cast iron skillet if you've got one, ten or twelve inch works for most families. Cast iron holds heat evenly across the surface, which matters just as much as the press itself. A thin nonstick pan will have hot spots that no amount of pressing can fix, and I've tried it both ways enough times to know the pan matters as much as the technique.
Pull your bacon out of the fridge about ten minutes before you cook it. Cold bacon straight from the fridge hits a hot pan and seizes up fast on the outside before the inside has a chance to render, which is part of why it curls in the first place. Ten minutes on the counter takes the deep chill off without letting the meat sit out long enough to worry about.
Lay your strips out so you can see how thick they are. Thick-cut and regular-cut bacon cook at different speeds, so I try not to mix them in the same batch. If you've got both, do two rounds. I keep the thick-cut for weekend mornings when nobody's in a hurry, and the regular-cut for weekdays when I'm trying to get everybody fed and out the door.
Pat the strips dry with a paper towel before they go anywhere near the pan. There's usually a little moisture on packaged bacon, and a dry surface browns faster and pops less grease at you once things get cooking. It's a small step but it saves you a wiped-down stovetop later.
Step 2: Preheat the Pan and the Press Together
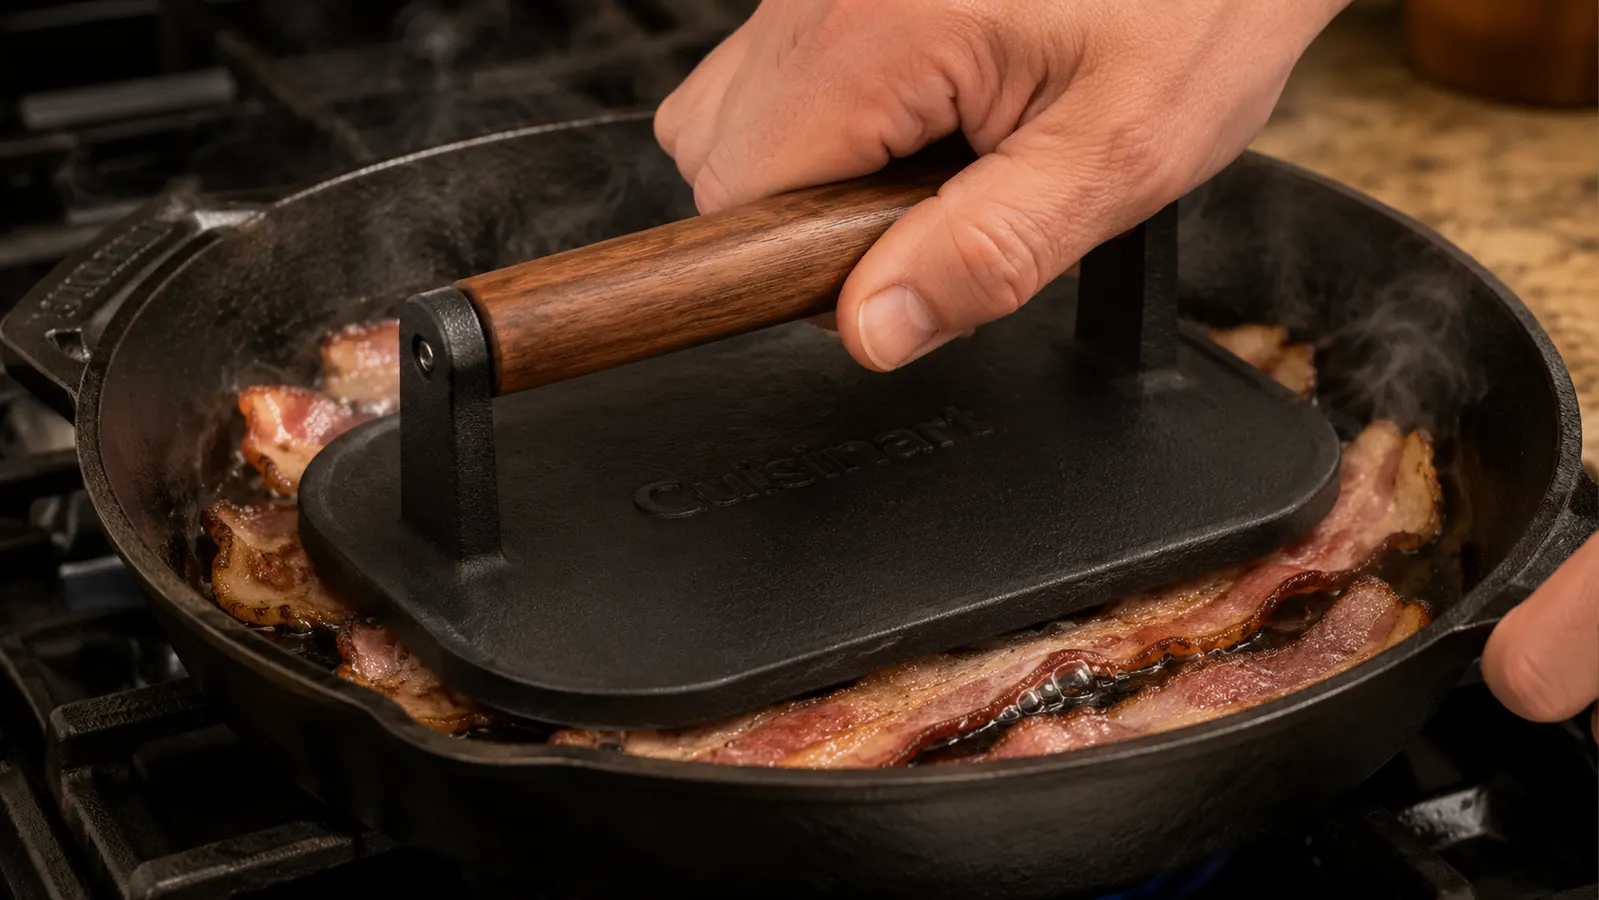
This is the step almost everybody skips, and it's the one that makes the biggest difference. Set your skillet on medium heat, not medium-high, and let it warm for a good three or four minutes before anything touches it. Set the cast iron press right in the pan or on a back burner so it's warming up at the same time. A cold press dropped onto hot bacon will actually cool that section of the strip down and slow the rendering right where you need it fastest.
I know medium heat feels slow when you're hungry, but bacon cooked too hot browns the surface before the fat underneath has melted out, and that's exactly the uneven cooking that leads to curling and burnt edges. Give it the extra few minutes. Your coffee will still be hot.
A good way to check if the pan's ready without a thermometer, flick a few drops of water into it. If they skitter across the surface and disappear in a couple seconds, you're close. If they just sit there boiling in place, give it another minute.
The Cuisinart press has a wooden handle, and it stays cool enough that you can grab it bare-handed straight off a warm pan, which is one less thing to juggle when you've also got tongs going in the other hand. That little detail matters more than it sounds like when you're moving fast for a full table.
Step 3: Lay the Strips In and Press Within the First Minute
Lay your bacon strips in the pan with a little space between each one, don't crowd them shoulder to shoulder or they'll steam instead of crisping. As soon as the strips hit the pan, set the cast iron press down on top, pressing gently but firmly across the whole batch. You're not trying to squeeze the bacon flat like a burger, you're just holding it down against the pan so the whole strip touches metal instead of just the high points.
Leave the press sitting there for the first minute or two while the strips start to render. This is when curling wants to happen, so this is when the weight matters most. You'll hear the sizzle even out as the fat starts pooling flat under the press instead of pushing the bacon up on one edge.
If your press doesn't cover the whole pan, and the Cuisinart rectangle one covers about six strips at a time in my ten-inch skillet, work in sections. Press the first half for a minute, slide it over, press the second half. It only adds a minute or two to the whole job, and it's still faster than standing there flipping curled strips one by one with a fork.

Step 4: Flip Once, Then Press Again
Resist the urge to keep lifting the press to check on things. Bacon needs a solid three to four minutes on the first side before it's ready to flip. When you do flip, use tongs, not a fork, so you're not poking holes that let fat escape too fast on one spot.
Once you've flipped every strip, set the press back down for another minute or so. The second side cooks faster since the fat is already partway rendered, so keep an eye on the color rather than watching a clock. You're looking for a deep amber, not dark brown, since bacon keeps darkening for a few seconds even after it leaves the heat.
For thick-cut bacon, expect closer to five minutes per side. For the regular-cut stuff most grocery stores carry, three minutes a side is usually plenty once the pan is properly preheated. Every stove runs a little different, so your first batch is your test run. Once you've found your timing on your own stove, remember it, because it'll be the same every time after that.
Listen more than you look during these last couple minutes. A steady, even sizzle across the whole pan means everything's rendering together. If one section goes quiet while the rest keeps popping, that strip is done before its neighbors, and you can pull it a little early with the tongs while the others finish.
Step 5: Rest It Flat, Don't Stack It
Pull the bacon out with tongs and lay it flat on a wire rack over a paper towel if you have one, or straight onto paper towels if you don't. The mistake most people make right here is stacking hot bacon strips on top of each other. Stacked bacon traps steam between the layers, and that steam softens the bottom strips right back into limpness after all that work pressing them flat.
Give it thirty seconds to a minute to firm up before serving. That short rest is when the crisp really sets. Bacon straight off the heat always feels a touch softer than it will a minute later, so don't panic if it seems a hair underdone the second you pull it.
If you're cooking for a crowd, keep a low oven going, around 200 degrees, and hold finished batches there on the wire rack while you work through the rest. Never stack them, even in the oven. Spread out on the rack, they'll hold their crisp for a good half hour without drying out, which matters when you're feeding a table of grandkids who don't all sit down at the same time.
What Else Helps
A splatter screen saves your stovetop and your forearms if you're cooking a big batch for a crowd. And if you're doing this for a reunion breakfast, cook in batches of six to eight strips rather than crowding twelve into one pan, you'll get more even results and won't be scraping burnt bits off the bottom by the third round. I also wipe the press down with a paper towel between batches so the underside stays clean and doesn't transfer dark bits onto the next round of bacon.
Save the rendered fat. I keep a small mason jar in the fridge for bacon grease and use a spoonful of it to fry the morning eggs in the same pan. It picks up just enough smoky flavor to make plain scrambled eggs taste like something worth getting up for.
If you don't own a cast iron skillet yet, the press still works fine in a heavy stainless pan, just watch your heat a notch lower since stainless doesn't hold temperature quite as evenly. The press is doing most of the work either way, the pan just needs to be sturdy enough not to warp under the weight.
Cleaning the press takes about ten seconds. Wipe it down while it's still warm with a paper towel, and if bits stick, a quick scrub with hot water and a stiff brush handles it. Skip the soap on cast iron and dry it right away so it doesn't rust sitting in the drying rack overnight.
The press doesn't cook the bacon any faster. It just makes sure every part of the strip cooks the same as every other part, which turns out to be the whole secret.
Ready for flat, even bacon at every breakfast
The Cuisinart cast iron press with the wooden handle is the same tool I reach for on smash burgers, grilled cheese, and now bacon most Sundays. One tool, a lot of uses, and it's the kind of thing that earns its spot in the cabinet fast.
Amazon Check Today's Price on Amazon →